2. Libraries
In this step, we will install the following three libraries: Pillow, OpenCV and Pyzbar. Pillow library is also known as PIL, which stands for Python Image Library. OpenCV is a well-known library, especially when working with computer vision projects. And lastly Pyzbar, a python library that will help us read the barcode and QR codes. Let’s start installing them. Pillow
Official documentation can be found here.

OpenCV OpenCV (Open Source Computer Vision Library) is an open-source computer vision and machine learning software library. OpenCV was built to provide a common infrastructure for computer vision applications and to accelerate the use of machine perception in commercial products.
Reference: https://opencv.org

Pyzbar Installation of Pyzbar library is different depending on the computer you are using. I will show both Mac OS and Windows installation lines. You can also learn more from Pyzbar’s official documentation page.

3. Decoding Function
In this step, we write the decoding function, where most of the cool things will be happening. The decoding function will be doing mainly three things, and can be listed as follows:
- Recognizing and decoding the barcode/QR code that we will be showing to the camera.
- Adding the stored information as a text on the recognized barcode/QR code.
- And lastly, exporting the stored information as a text document.
Let’s import the libraries we installed before we write to the function:

Now, let’s write the function. Instead of adding part by part, I will share the whole function with you. Since, indentation matters when writing in python, I don’t want to disorganize things by ruining the structure of the code. I will add my comments below the code.
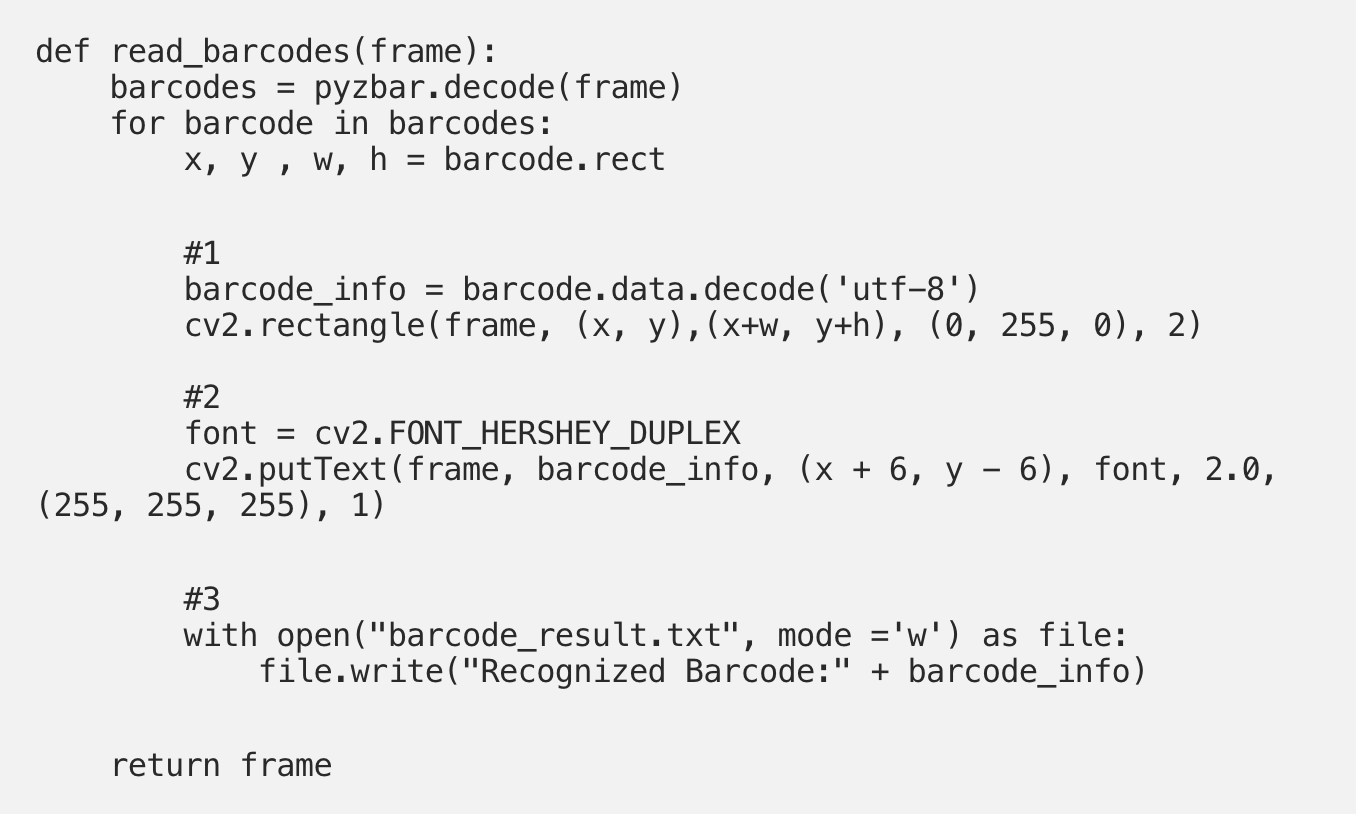
Understanding the function
- Firstly, we are decoding the information from the barcode or QR code. And then drawing a rectangle around it. This helps us to see if our machine has detected the barcode/Qr code.
- Secondly, we are adding text on top of the rectangle that was created. The text will show the decoded information.
- Thirdly, we are exporting the information into a text document. If you are planning to test with multiple barcodes or QR codes, I recommend changing the document name otherwise it will overwrite.
4. Main Function
In this step, we will write the main function, where the application is prompt to work. The main function will turn on the video camera of the computer, and the then call the decoding function. Here is the code:
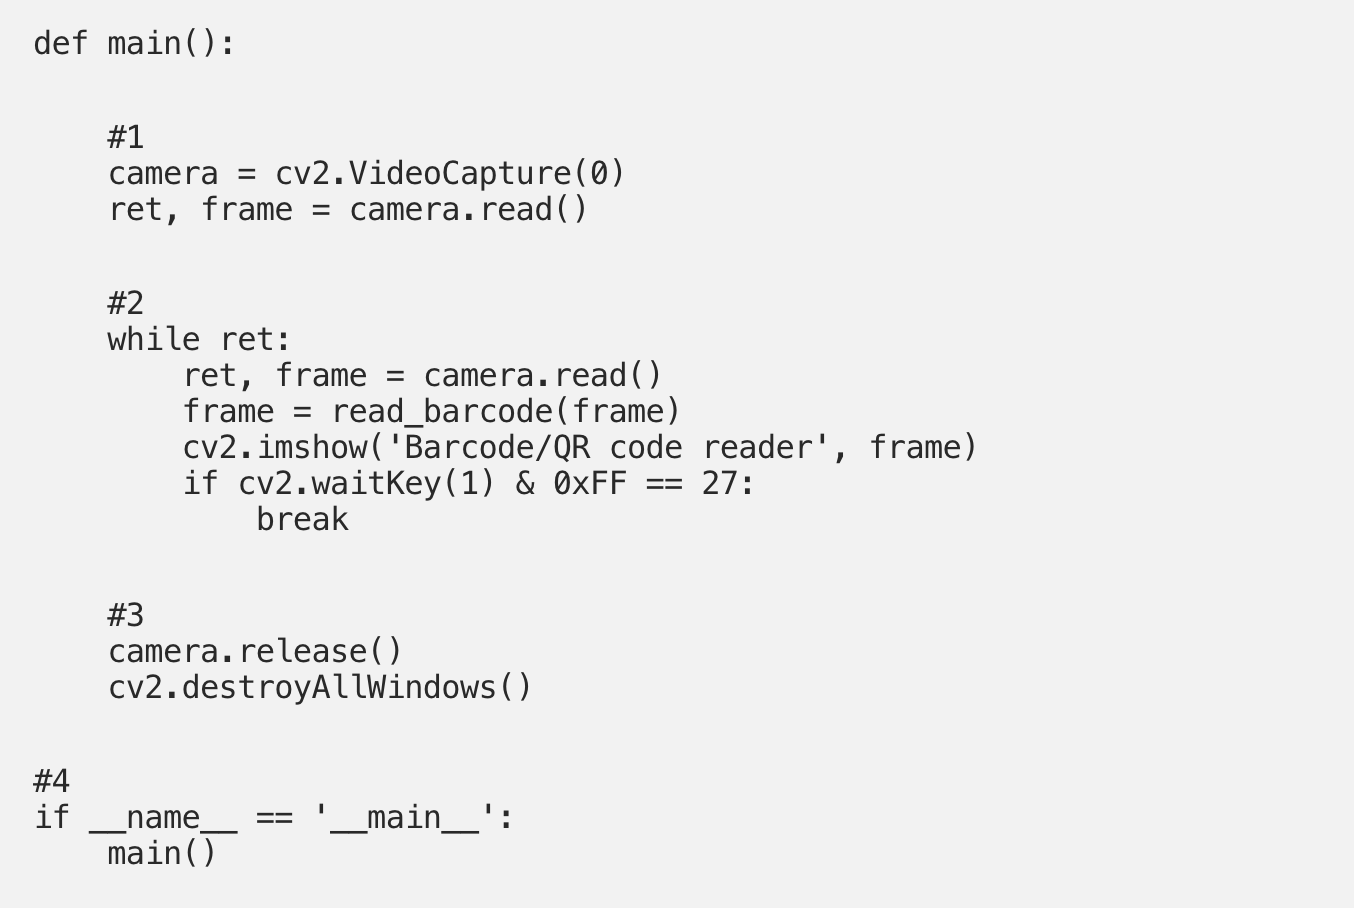
Understanding the function:
- Firstly, we are turning on the camera of the computer using OpenCV. If you have an external camera, you have to change the value 0 to 1 depending on the device.
- Secondly, we run a while loop to keep running the decoding function until the “Esc” key is pressed. Otherwise, the loop will not stop and cause some issues.
- Thirdly, we are releasing the camera that we turned on in the first step. And then we are closing the application window. OpenCV is doing all the work, we just need to call the methods.
- Lastly, we are calling the main function to trigger the program.
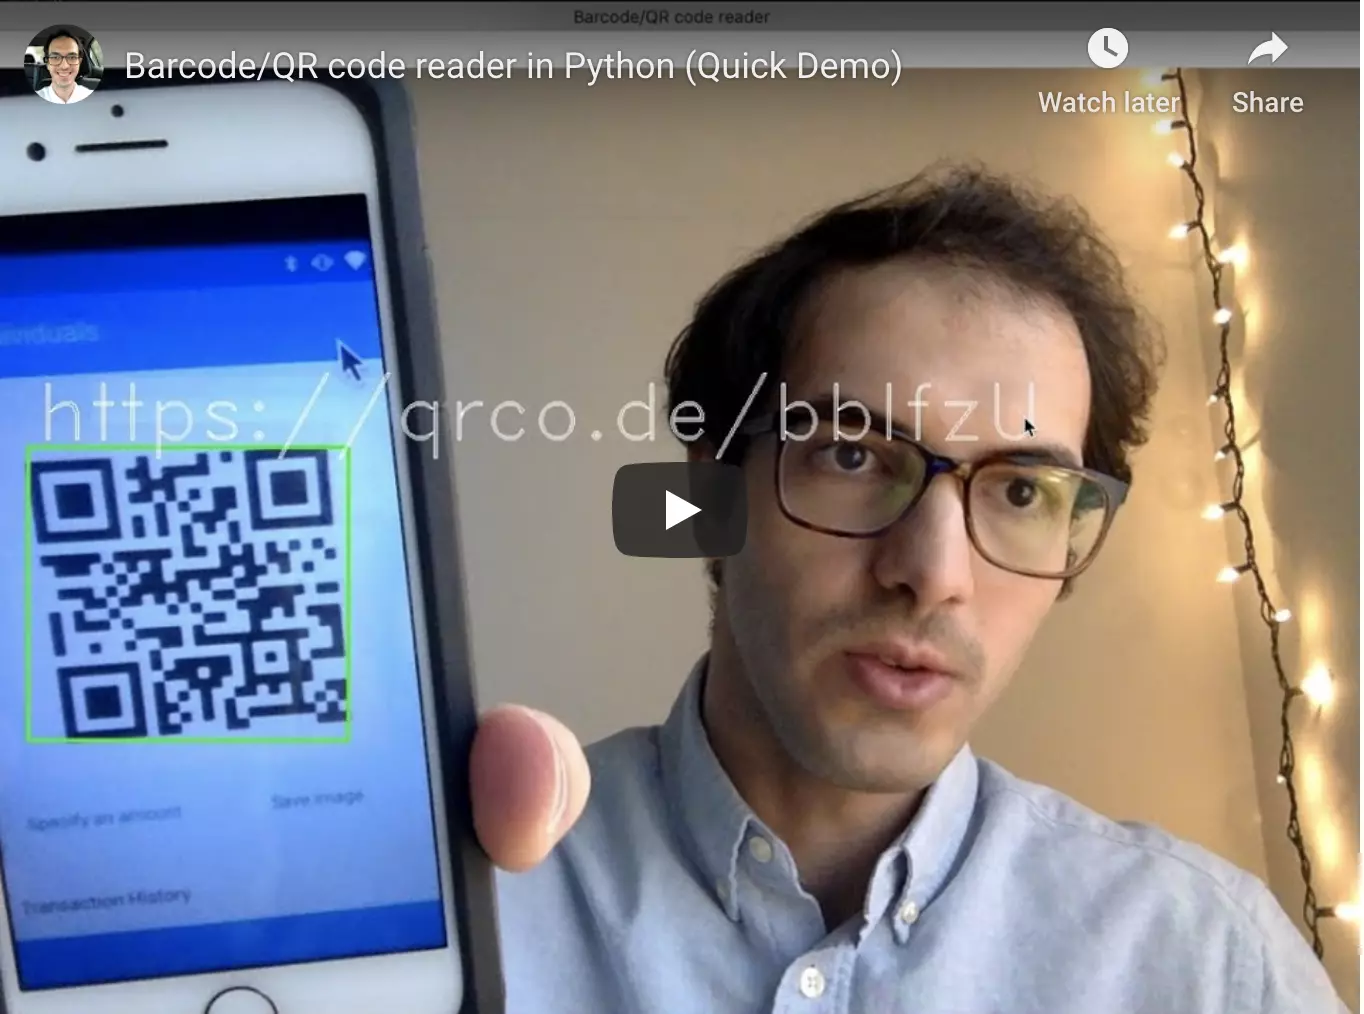
Perfect! We are done with the programming part. Let me show you a quick demonstration to see how it works when we run the program.
5. Video Demonstration
Congrats!! You have created a program the reads barcodes and QR codes for you. Now, you have an idea of how to use computer vision and artificial intelligence in the real life. Working on hands-on programming projects like this one is the best way to sharpen your coding skills. I would be glad if you learned something new today.
Feel free to contact me if you have any questions while implementing the code.
Follow my blog and youtube channel to stay inspired.

Leave your comments
Post comment as a guest