3. Designing the Application Window
In this step, we will first define the window panel using Tkinter package. And after that, we will define the text design that we want to use for the digital clock.
Define the Window
As mentioned earlier, we will use Tkinter package. Tkinter is can be defined as Tk. And after defining it, we will customize it.
Understanding the code:
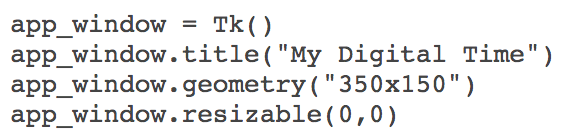
- Defining the Tkinter function.
- Giving a title to our application window.
- Defining the size of our video, for example in my case, it’s 350pixels width to 150pixels height.
- The window is not resizable, because the text values are not responsive design. And we don’t want our design to look weird when the window size is changed.
Perfect, our application window is ready! Now, let’s work on the clock design.
The Label Design
The cool step of the program is this one. Because you can put your own preferences into the design. This step will make your work different from others. If you love designing things, it’s time to show off your skills.
There are four elements that we will customize:
- The font of the digital numbers.
- The background color of our digital clock.
- The color of the digital numbers, make sure it is not the same color as your background. 😉
- The border width of the text.
Here are the values that I used for my design:
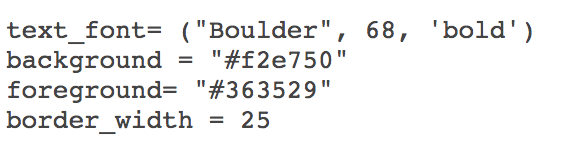
For colors, feel free to use RGB values or hex values. In my case, I used the hex values of the colors. I use google’s color picker that is available on the browser. Just search “Color picker” on google search. And you will see it.
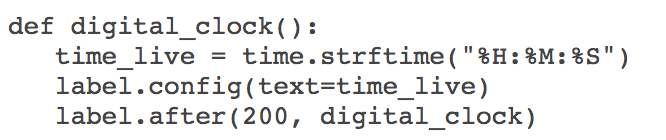
Now, let’s combine the elements and define our label. Label function is the text that will show our time.

If you want to learn more about the attributes of the Label function, here is a nice page I found.


Leave your comments
Post comment as a guest