Comments (3)
Rob David
Very helpful
Paul Dexter
I have recently updated my Mac. Thanks for the instructions !
Lukas
I love the
Change the Terminal Settings on the Mac
section, I seriously didn't know how to open a terminal.

For a very long time, Apple users had been requesting the developers for an update to the macOS. The older macOS seemed dated and did not provide a user experience similar to the ones on iOS.
Apple took note of the demand and released what is its biggest update for over 20 years!
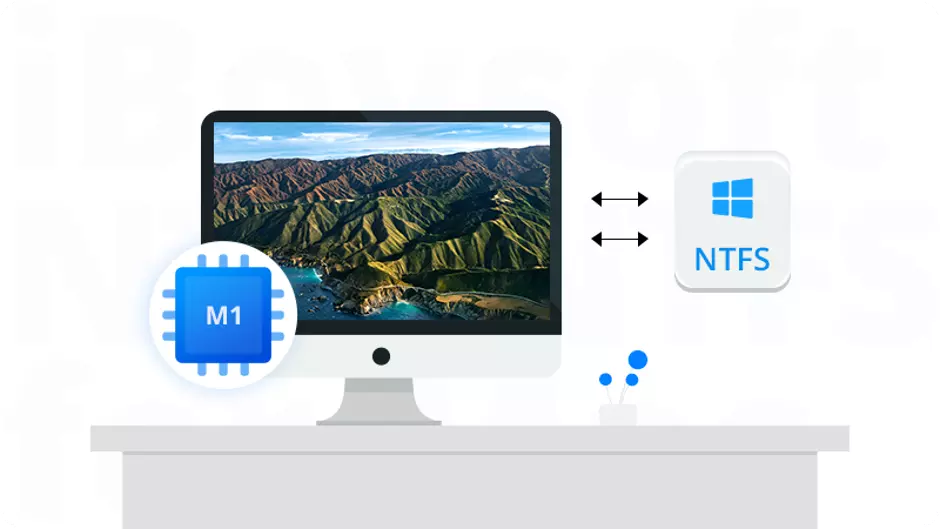
The new and improved macOS 11, has been released under the Big Sur name. It promised a great interactive and engaging experience for users. Together with the at-home developed new M1 Chip, it promises to set performance and efficiency benchmarks.
The macOS 11 Big Sur will also be available for older MacBook Air and Pro who have the Intel Chips.
However, one thing, which still has evaded users of macOS Big Sur is the non-compatibility with NTFS Files.
In this article, we are going to help users to enable NTFS Read-Write Support in macOS Big Sur.
Older Apple macOS users will attest to the fact that you cannot write NTFS files on your systems. While the macOS allowed for reading the files, any editions, renaming, deleting of files was not allowed.
The same has been carried forward to the new macOS 11, Big Sur. You still get the same read-option, but no writing is allowed. On news MacBook Air, MacBook Pro or Mac mini with Apple silicon M1 chip, some people even can't see their NTFS files on Mac even though NTFS drive can be opened. NTFS or New File Technology System is proprietary software owned by Microsoft.
From 1993, it has been the chosen file system for maintaining, reading, and editing data on external hard drives, pen drives, and memory cards.
For Apple to start using the same in the new macOS Big Sur would mean paying a hefty license fee to Microsoft. The same would also have been inconsistent with Apple’s philosophy of promoting cross-platform functionalities.
The thing you need to know is that if you have an external hard drive, which is in the NTFS file format, you cannot use it interchangeably on your Windows and Apple systems simultaneously.
1. NTFS For Mac Software
The simplest way, one that is chosen by several thousand Apple users the world over is using a credible third-party NTFS for Mac Software. However, with the Big Sur, not every NTFS for Mac software has been shown to perform.
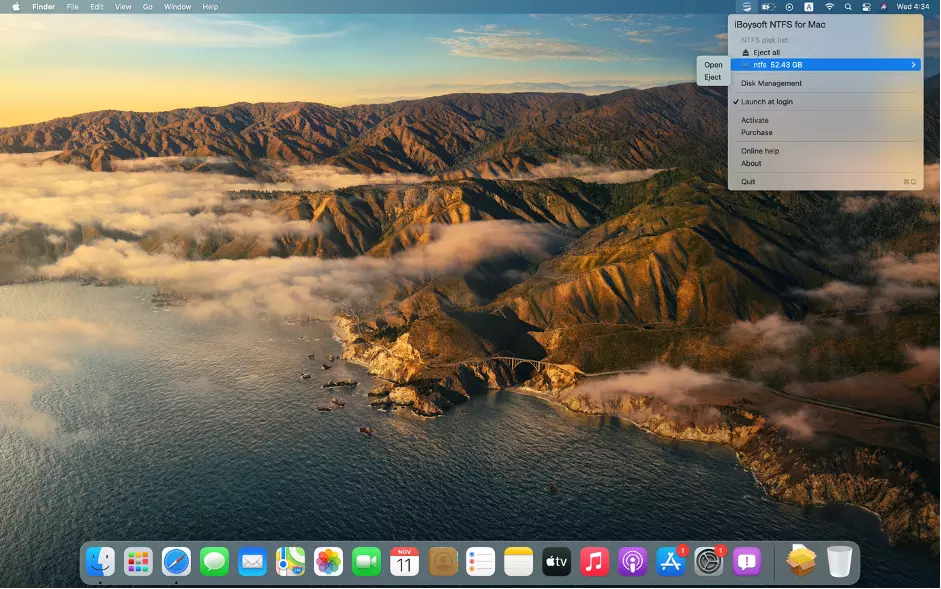
This means that you are left with just a few options when it comes to choosing NTFS for Mac Big Sur software, which allows you to seamlessly read and write NTFS files on your Mac. iBoysoft NTFS for Mac software has been critically examined by reviewers and shown to be completely 100% compatible with the new macOS Big Sur and Macs processed by M1 chip.
The compatibility of other third-party NTFS for Mac software has been found to be waiting.
How to use NTFS for Mac driver to write to NTFS drives in macOS Big Sur:
Step 1: Download a tool that clearly states that it is compatible with macOS Big Sur. If the Mac is running macOS Big Sur and it is a M1-equipped Mac, you need to make sure the tool is workable on M1 chip Mac too.
Step 2: Double click the installer to load the software to be installed.
Step 3: Click Allow in the Security & Privacy window. In the new macOS, it will require all third-party software manually allow System Extension.
Step 4: Keep installing the software on Mac and restart the Mac after the installation completes.
Step 5: Connect the NTFS drive to the Mac and it will be mounted in a readable and writable state automatically.
2. Change the Terminal Settings on the Mac
First things first, in order to use this option, you would require a basic knowledge of coding. You need to open up the Apple Terminal by pressing the ‘Command’ and the ‘Space Bar’ at the same time. Type in the word Terminal and press enter.
As you can see, this process is not easy and requires getting dirty with lines of coding. If you are not technically skilled or proficient, experts suggest that it is best to leave this strategy. Another reason why this method is not recommended is that the native NTFS write support in macOS is little tested and believed to be risky in data loss.
You can always have the advantage of using the other two options and ensuring that your files and your new Mac is safe and sound for future use.
3. Use a FAT or ex-FAT Format for your Hard Drive
Apple’s macOS extends read and write capabilities to the File Allocation Table or FAT format. Both the FAT and its newer version, ex-FAT is compatible for read-write functions on your Mac system.
However, the only major problem with the FAT format is that it does not support file sizes beyond 4GB. This means designers, video editors, and others would not be very happy.
On the other hand, the ex-FAT format is not a safe option for transferring files. There have been numerous reported instances of files getting corrupted or deleted when moving from the NTFS to the ex-FAT format.
To do so:
Step 1: Back up files.
Step 2: Open Disk Utility application.
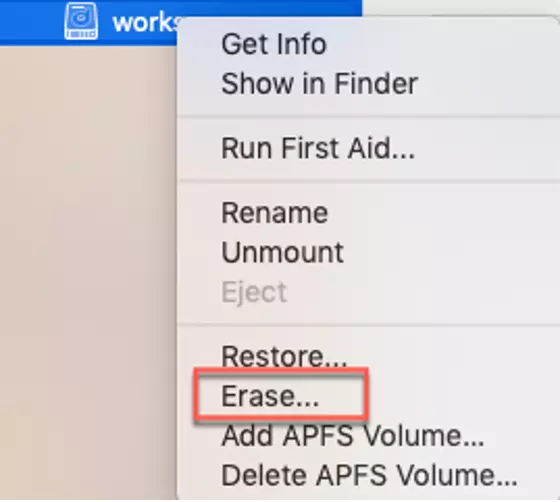
Step 3: Connect the external NTFS hard drive to the Mac and find it in the left disk list of Disk Utility.
Step 4: Right-click the drive and choose Erase or select the disk and click on Erase button at the top tool bar in the window.
Step 5: Input name, select a Format (FAT or ExFAT) and Scheme (GUID Partition Map).
Step 6: Confirm by clicking on the Erase button on the pop-up.
If you are someone like me who wants their software to provide ease of use, then using a third-party NTFS for Mac software from iBoysoft is the most credible option. We do not know if the later versions of Bit Sur will be rolling out full read-write capabilities for Mac users. If you wish to know more about reading and writing NTFS files on your Big Sur, let us know in the comments section below.

Very helpful
I have recently updated my Mac. Thanks for the instructions !
I love the
Change the Terminal Settings on the Macsection, I seriously didn't know how to open a terminal.
BBN Times connects decision makers to you. Experts in their fields, worth listening to, are the ones who write our articles. We believe these are the real commentators of the future. We quickly and accurately deliver serious information around the world. BBN Times provides its readers human expertise to find trusted answers by providing a platform and a voice to anyone willing to know more about the latest trends. Stay tuned, the revolution has begun.
Leave your comments
Post comment as a guest